Event Form Basics
This guide provides a brief overview of submitting an event request in 25Live and gives information about each section of the request form.
Getting Started
First, log into 25Live.
It will prompt you to log in with your Smith network credentials. At this time, any first-time users will have their 25Live account automatically created.
This will place you on your home (Dashboard) screen.
From here, you can click on the Event Form button in the upper right corner or the Create an Event widget on your Dashboard, if you have it. Since the Dashboard is customizable, not everyone’s will look exactly like this. (See more information on customizing your Dashboard.)

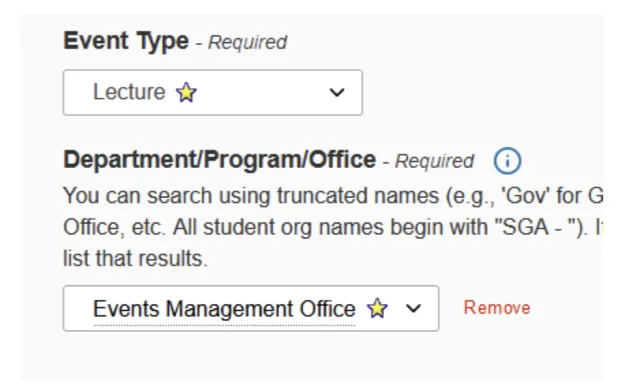
Components of the Event Form
This is the name/title of your event. This field has a character restriction, so please utilize the Expanded Event Name field to provide a more detailed title, especially if the intention is for your event to be publicized anywhere. If your full title fits in the Event Name field, you do not need to enter anything in the Expanded Event Name field.
This field is used in a few ways: to populate calendars, to prompt the follow-up questions that may be generated below (e.g., events with food), to create automatic assignment of resources, to notify service providers, and so on. It’s important to select the type that most closely matches your event.
Who is the owner of this event? This is especially important for certain departments that have their own departmental calendar generated from 25Live events.
Tip: You can star/favorite your department to quickly pull it up again next time!
This is not currently a required field, but it is helpful to enter an approximate number so that the space scheduler will know whether your requested space is suitable for the event. It’s also helpful for providing a heads-up to Campus Safety about particularly large crowds, and so on.
This is not a required field, but if your event is open to attendees and you want your event listed on the public Smith calendar or departmental events calendars, please enter a description so that potential attendees know what your event is all about.
One-time event
If your event occurs only once, first choose your desired date, then enter the start and end times. These are the actual event times. If you, as the requester/planner, need to get into the room early or anticipate staying late, please enter that in the Additional Time field. For example, if you want to hold a lecture on June 27, 2024, from 5 to 6 p.m., but you want to have the room for 30 minutes beforehand to prepare and you anticipate that folks may linger afterward, your request may look like this:

Please note that the space scheduler may also add additional time for other setup and breakdown needs or to allow for a larger buffer between events, where appropriate.
Events with multiple occurrences
If you’re creating an event that occurs more than once, such as a weekly department meeting or a monthly luncheon, enter the information about the first meeting/occurrence, then proceed to the next section.
You can use the Repeating Pattern button to automatically generate the pattern for you, or simply click on the dates on the calendar to add additional days.

The Manage Occurrences button allows you to edit individual meeting times (if they’re not all the same), delete occurrences that you may have accidentally added, or add a new meeting directly from this screen:

This is where you’ll select your location(s). If you know the location already, search the name in the box on the right. If you want to use a saved search, choose the dropdown on the left. There are some previously created public searches that may be useful in choosing a location.

Tip: Star locations that you use frequently! This will put them in an easy-to-access search, so that you’ll be able to quickly find/reserve the locations you use most often.
Tip: If you searched for a location that you were expecting to see and nothing came up, please ensure the Hide Conflicts and Enforce Headcount boxes are not selected.
Tip: Mousing over a location name will give you some brief information about the location. “Features” are simply details about the location: equipment it may have, tech considerations, etc. These are things that never need to be requested, as they’re already there.
Once you’ve searched for locations, you’ll be able to see the availability of the space and can request it using the boxes on the left. If a space is not available on some of your preferred dates, it will tell you that there is a conflict. It will allow you to request the available times.

After clicking the buttons on the left, your selected locations will pop up below, and you can view/manage those occurrences.

Important: The Location Instructions field is not seen/used by custodial support. If you need your room arranged in a particular way, this will need to be requested in the Resources section below.
Resources are things (e.g., equipment, services) that need to be requested from our campus service providers, such as Facilities Management and Information Technology Services (ITS). You can search for Resources by typing in the search field, using a Saved Search (such as Your Starred Resources—so be sure to star your most commonly requested Resources!), or using a Search Filter (such as the Tech Equipment category—this will list all tech resources).

After choosing your quantity and clicking the Reserve button, your Resource selection(s) will appear below. Important: Please use the Instructions field to provide information about your selection so that the service providers can assist in the most efficient and accurate way. The more information you provide, the greater chance for successful setup and execution of your event.

You can click the View Occurrences box for each Resource and adjust quantities, instructions, etc., if they are different for each date. It allows you to, for example, request 20 chairs one day and 10 chairs the next, with different setup instructions for each date.
Please note that some locations on campus have their own specific Resources (such as the Conference Center and Campus Center). These Resources should only be selected if you’re requesting one of those spaces. Don’t request “Campus Center Only” chairs if you’re selecting space in Seelye, for instance.
This field populates automatically based on the information provided. Certain meeting types (e.g., food events like lunches), locations, etc., may result in additional questions generating at the bottom of the form, such as those below. They must be answered in order to proceed and successfully save the event request.

These will generally populate automatically based on things like department, event type, etc. They may also be used internally for tracking, calendars, etc. You don’t need to add anything additional; you can if you choose, but it’s not necessary. This is most often a field that’s used by more advanced event planners or the space schedulers who process your event.
Saving Your Request
When your event request form is complete, click the Save button on the bottom right.

If you click on it and nothing happens, it means some piece of required information was not entered. When the save is successful, it will take you out of the Event Form and into the Event Details. You’ll also see a pop-up notification on the bottom left indicating that your request was saved. From there, the event request will go to the space scheduler for processing.
Frequently Asked Questions
25Live is the event scheduling software that serves as a central database for events on campus, and is used by staff and faculty to reserve spaces for meetings, lectures, large public events, and so on. The Office of the Registrar also adds academic courses into 25Live. Events in 25Live can be used to send information/requests to some of our service providers, such as Facilities Management, Campus Safety, and ITS. It is also used to provide information to event planners, such as times when a space may be offline for construction or special circumstances that may require additional considerations.
With full campus participation, the system allows us to avoid conflicting events, provides event data to populate public event calendars, allows Facilities to schedule maintenance in spaces, and offers a direct way to connect with service providers and provide information to event planners/requesters.
If you are on the Event Form and you search for a location but nothing appears, please ensure that the boxes Hide Conflicts and Enforce Headcount are not checked.

With those two boxes selected, it will hide locations that have conflicts or where your headcount far exceeds the capacity. You may not be able to request a space if there is a conflict, but you would at least see it on the search and understand why it’s not available.
If you have these boxes clear and a location still does not appear, it could be that the location is not a requestable space. Not every space on campus is reservable for general events, or some may be reservable only for certain groups or under very specific circumstances (e.g., labs, studios, etc.). If you’re trying to request a space that does not appear at all, please reach out to the Events Management Office or the department that controls the space for more information and to discuss the space’s specific usage.
If you need assistance with technology, equipment brought to the location, a room arranged in a particular way, or other support for your event, you can add the appropriate Resources in that section of the event form. You can request equipment like tables, chairs, and waste bins. You can request services like trash pickup, doors to be unlocked, and tech help. If it’s not already in the room or something you’re bringing yourself, it should be requested here. If you’re not exactly sure which Resources to select, when in doubt, choose the Event Custodial Support resource for Facilities help and the Tech Help Start resource for CEMS support. In the Instructions field describe what you need, and the request will be routed to the appropriate staff who can assist.
Please note that Smith Catering is a separate service and must be arranged through Catertrax.
After an event draft is created, it is assigned to a space scheduler. That scheduler will review your request, ensure the event can work in the desired space, and either confirm your event, or reach out with further questions or to provide context for a denial. You should receive communication from the space scheduler within a couple of days.
Date/time/location
Once an event is confirmed, only the space scheduler can change these details. If you need to change the date, time, space, or cancel the event, please reach out to the scheduler who confirmed your event and they can assist with making that change. Your event’s scheduler can be found via your confirmation email or by finding your event in the Your Upcoming Events widget on your 25Live Dashboard. When requesting a change, please provide your event’s reference number (e.g., 2024-ABCDEF), as that is the easiest way for the space scheduler to pull up your unique event.
The resources (services) I’ve asked for
You can add/remove/adjust resources and quantities anytime. However, all changes should be submitted at least two weeks in advance for ITS requests and at least six days in advance for Facilities Management (custodial & setup) requests.
The event title, description, event type, audience, etc.
You can change these on your own whenever you’d like. Please note, though, that most calendars do not update instantly, but require some time to refresh.
Information about a space is found in the Details tab when looking into a location (on your Dashboard, search for a location, then click on the Details tab on the left). This page contains information that may be useful in determining whether it would be appropriate for your event. Features are things that are already in a space and do not need to be requested separately. For example, if a room has a projector, you don’t need to request one. Layouts are potential ways that a room could be arranged. Classrooms may only have one potential layout, as they generally cannot be rearranged, but a space like the Carroll Room may offer many possibilities. If you want a particular room layout to be set up, this must be noted in the Instructions field of the Event Custodial Support resource.
After searching for a location (or multiple locations), click on the Availability tab. This will show you what is currently scheduled in the space(s). If you click the Include Requested box, it will also show you any pending drafts that have not yet been processed. It is good practice to always click this box to ensure that you’re seeing the full picture and will know if someone else has already requested a space you are looking for. (Tip: You can create your request right from this Availability grid by clicking on the grid and selecting the times you want. It will take you right into the event form with the date/time/location prefilled for you!)
The Office of the Registrar has priority scheduling over classrooms during standard class time blocks. Generally, course locations are not finalized until approximately three weeks into the semester due to enrollment changes, classroom change requests from professors, technology needs, and other factors. As a result, noncourse events in classroom spaces cannot be confirmed until the Events Management Office is given clearance from the registrar’s office. This means that you may not find out until a day or two before your event whether it can actually occur in your desired space. If necessary, we may suggest a different location for your event. After classroom holds have been released, events for further out in the semester can be confirmed or moved into an alternate space.
If you must hold an event in the first three weeks of the semester, it may be prudent to find a nonclassroom space that is not subject to this restriction.
If you’ve filled out your Event Form and selected a location with no conflicts, the most common cause of getting “stuck” on the event submission is an unanswered question in the Additional Information section. This section of the Event Form populates automatically when certain criteria are met (based on location, event type, etc). Items with an asterisk must be answered in order to proceed.
